Showing posts with label personalization. Show all posts

Saturday, February 9, 2013

White Coat Ceremony Dress

A White Coat Ceremony is an event put on for new medical students as a sort of "pre-induction" into the medical profession. Speeches are heard, the oath of a student physician is administered, and the short white coats worn by medical students are donned while our families look on and applaud.


During the weeks leading up to the ceremony, the one big question going through my mind was "WHAT AM I GOING TO WEAR UNDERNEATH TO COMPLIMENT MY WHITE COAT?" It was a perfect opportunity to flex my designer's muscles in an effort to achieve the perfect blend of unique, professional, chic, flattering, along with something that screams "ME!"

I was highly pleased with how the dress I made for the first day of school turned out.  Since the pattern I used had many different options, I figured I'd try out another one for this event. For the last dress, I had used a V-neck and 3/4 length sleeves. This time I thought I'd opt for the mock-turtleneck and cap sleeves. (Note to self: try that cowl-neck for the next dress!)


While going through my fabric supply, I found the perfect one. My school's seal has 2 shades of blue as well as a bright yellow in it. I found a cheerful yellow fabric that I just had to use. Funny thing, it had been sitting in a drawer for 10 years! I purchased it while I was living in Japan and made a pair of very cute trousers. I don't know what happened to those (lost in one of the 10 moves I've done since then, likely), but I had the rest of the fabric!

One problem: there looked like there wouldn't be enough. Ugh.


But with a little spatial creativity, I managed to cut all of the pieces out that I needed. The scraps I had remaining attest to just how close I cut it. And I got quite lucky, considering how weird the cross-hatching stripes would look if I didn't have them in the right direction. 


It was a couple weeks before I finished constructing the dress. Med school is not exactly easy, after all. The afternoon before the ceremony, I had the dress built.


But something was missing -- I needed some extra pizazz. So I put the rest of my to-do list on hold, ran across town to Michaels, and grabbed whatever I thought might add a little flair. After a few different options were tried, I ended up with some asymmetrical detailing including a belt, a ribbon on the shoulder, and a few oversized, fabric-covered buttons. The green conveniently matches both the stripes on the fabric, and my lovely green eyes


Here I am on stage, with one of our professors helping me to put on my white coat. 


And here's the reception afterwards, where I am enjoying the celebration with my dear grandmother Shirley, who flew up to Portland just to see me!


And look -- see what I mean about the yellow matching the color on our school seal? It really does tie it together well if I do say so myself. Very well done, Holly, very well done. 

Saturday, January 19, 2013

Moving Day Dress

You know those days when your to-do-list is about 2 miles long and no matter how hard you work you can't seem to check off more than one thing at a time? Well, sometimes when those days roll around I often toss my entire to-do-list out the window and pick up a new sewing project instead!

And thus the "Moving Day Dress" was born.

Back in July I had already been packing for a couple weeks, and I was running out of steam as moving day approached. The day before I hauled all of my stuff up to Maine in a U-Haul I could have cleaned up my room, moved the last few boxes downstairs to be ready for the truck, or done anything to continue getting ready. I could have done any number of things that don't involve sewing. But clearly I HAD to get out my unused fabric and go through all my patterns and pick a gorgeous new ensemble to concoct.


I decided on a striking calico pattern I had grabbed in the last days of my local Joanne's closing sale last year, which I love for summer because it reminds me of Japanese lantern festivals. The pattern I picked was an old out of print pattern I'd bought for a song some untold years ago, and *gasp* have never used! Such a simple, retro style that would clearly flatter me and I haven't once touched it? Shocking.


Within a few short hours I had a gorgeous dress.

But something was missing! It was a great dress that would serve well for many a summer occasion, but it lacked a certain flair. After much brainstorming and perusal of various sources of inspiration online, I decided that my dress needed an oversized, floppy bow.

The first iteration of a proved a resounding failure, and I'm pretty sure I've discarded all photos of that disaster (placement was too high, weight dragged down the silhouette, utterly unflattering). But it gave me one significant eureka moment: the bow must be removable! A waistband and a large snap closure provided the removability, and voila the dress was finished. 

And here I am, showered and exhausted after a long, sweaty day of moving, enjoying my new apartment in my dress made just for the occasion.


Monday, May 14, 2012

This is what I wear when it's really important

Guess what! I got accepted to medical school!!! 

YAY YAY YAY YAY! Come August, I will be joining the ranks of the University of New England College of Osteopathic Medicine's class of 2016. In four short years, I might just change the name of this blog to "Dr. Hollybee Makes Stuff."

But this post is not about that. This post is about a lovely blouse that I just happened to make for my interview to said university. In the last few days before the MCAT I needed something to get my mind away from freaking out too much about the exam, and so I devised and implemented the design for this wonderful addition to my wardrobe. 


Why pale green? Why, to match my eyes of course!

I made a standard button-down slightly fitted blouse, and came up with the idea of adding the pleated detailing to the front in a kind of tuxedo-top style to add a bit of uniqueness to an otherwise normal design. 

Ohhhh my gooooodness --- those pleats took a lot of fabric!!


It took me hours to get those things right, and a number of minor burns on my hands and fingers from the iron (and pokes from the straightpins!). But I got those pleats looking gorgeous. I decided to add a flat edging to them to make them easier to deal with, and flipped one edge over to give a kind of twisted style to them. That way they were even more 3D and amazing. 


Here I am on interview day at the campus! I had just finished all the events for the day when I remembered I needed to snap a photo of myself in all my stylishness. Needless to say that grabbing a picture of myself in high winds by holding my phone backwards while juggling a full purse and a fountain soda was a bit of a challenge. But you can see me, a bit of the blouse, and even a bit of the campus in the background!


Lessons learned: I cut the sleeves a good inch longer than the pattern called for, which didn't even end up being long enough. This pattern requires a good 3 extra inches to be safe (am I that much taller than the average woman? Somehow I doubt it.). This was fixed in this case by adding another set of twisted pleats in between the sleeve and the cuffs. 

Fun fact: while working on the pleats for hours, I caught the movie "No Strings Attached" on Netflix, which just happens to feature Natalie Portman as a nerdy girl from MIT who goes to med school and becomes an awesome doctor! And then she has lots of sex with Ashton Kutcher! Good thing Demi Moore's out of the way, because it looks like I have a great future ahead of me!


Sunday, July 17, 2011

A Dress Per Day, Day 1

Here we go...

It wasn't a real project until it turned into one.

You see, I decided I needed more summer dresses. And I was coming up with these gorgeous ideas in my mind until I couldn't think straight in class anymore. So I waited. Until last Thursday, after which I had finished my first exam for Organic Chemistry II, and figured I had the whole weekend to sew to my heart's content.

First day's work: I found this pattern I had tucked away from forever ago:


I usually eschew "New Look" patterns, since they're lower quality than I usually pay for $3 (since I mostly wait until more expensive patterns are on sale for $1-2 before buying them), but there's no guessing what I was thinking at the time I bought this dinosaur.

So, digging deep, I happened to find a single piece of calico cotton fabric that was simultaneously 1). Suitable for a summer dress, 2). Had sufficient yardage to support the pattern, and most importantly, 3). Still matched my style and sensibility. Let's just say that I have a lot of random fabric left over from random projects like ... this one, I guess!

Fact: this fabric is left over from the plethora of extravagant togae I made for my high school's chapter of the Junior Classical League's annual state convention in State College, PA circa 2000. If my memory serves, it was purchased on Fabric Row in Philadelphia, PA, a location of eminent influence in my design development.

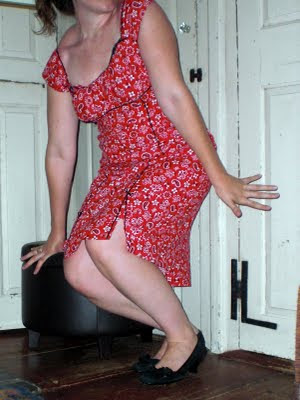
The vision of this dress did not fully come into play until it was almost fully realized. Now, behold: the Pin-up girl dress. Sexy, yet demure, red, black, white, and marvelous alllllll over.


You see?


And the detail I added just for fun:


This was finished on Friday, so I used more than one calendar day, and even though I call this "Dress per Day," I always seem to resort to finishing the last little bits for after certin deadlines. Less than 24 hours, though, so I suppose it counts!

In other news: by then a ridiculous thing had happened: I stopped by my local Joanne's Fabrics, only to find out that it was going out of business and had instituted a store-wide clearance sale. I proceeded to purchase more than a year's worth of fabric and spend the rest of the weekend enjoying the fruits of my purchases...

To be continued...


Friday, April 30, 2010

The Hello Kitty Sweatshop

Yesterday Beka and I were struck by a sudden inspiration to make hats. A friend of ours has a pair of hats from Japan that look like animals, so we borrowed one in order to make our own -- but instead of just any old animal we decided to go for "Hello Kitty" in various color combinations.

What transpired as a result of our half-baked idea ended up being hours and hours in front of the sewing machine, with fleece and felt flying everywhere. But we both ended up with two of the cutest hats imaginable as a result of our long-winded efforts. Materials required: fleece for the hat, felt for the decorations, and yarn for ... pom-poms?


We measured the hat we borrowed, and drew up a pattern for it. It ended up needing a fair amount of alterations, but with Beka having a small head and me having a HUGE head, it was inevitable when we were both using the same pattern.


The body of the had was quite simple with four identical pieces shaped like a bloated triangle to create the round shape plus a fifth piece: a long wide band to make the brim. Oh, and those little pieces? Those are the ears!


We had planned on making hats of two color schemes: black and white. The black version lent well to "girl-punk" style, and the white version I decided to do "traditional" Hello Kitty, so once the body of the hats were made I began sewing on the faces by hand.


Meanwhile Beka was doing a trial run of putting together some pom-poms, a craft which neither of us have done since our Elementary School days. I also remembered a technique for "faking" a bow where you sew two layers of fabric plus interfacing or another stiffener together, then scrunch it up in the middle with a ribbon wrapped around tight. Beka did a real bow on her black hat with actual ribbon, but I used pink felt and the aforementioned "fake" to do my bows


It kept going, and going, and going. After adding eyes, noses, whiskers, bows, and in one case even a pair of ear flaps and pom-poms, we almost missed dinnertime! But eventually we did finish.

Here are the traditional style Hello Kitty hats in white (note: Hello Kitty actually has a yellow nose, but we only had black and pink felt. I'm not going to quibble about it cause it looks cute as is).


And here are the "punk-rock" Hello Kitty hats in black, including mine with the ear-flaps and pom-poms. Beka made a set of pom-poms, and might add those to her white hat later. She is still considering adding ear flaps to the black hat, but is as yet undecided.


And then of course we had to go out to show off the awesome fruits of our awesome labors.


Meow.

Wednesday, April 28, 2010

Hula Hoops, YES, I made Hula Hoops

Another day and I'm not packing. I spent all of this weekend at Lafayette's Festival International de Louisiane (and not packing). While I was hanging out downtown enjoying wonderful live music from all over the francophone world, I spent a lot of time with a friend Beka, who has recently gotten very interested in hula hooping. She brought a bunch of hula hoops that she had made to the festival, and we were hula-ing up a storm during a lot of the performances.

Beka offered to make me a hula hoop of my own to take back up north, and so today we decided to throw ourselves a hula hoop making party! She came over with all the ingredients:

First of all the tubing: generic 3/4" polyethylene sprinkler tubing from Home Depot.


Next: couplings and electrical tape to secure the ends of the cut tubing.


And finally the decorative tape for the finishing touches.


First Beka cut the tubing to be the proper length. My utility knife was sad and dull, so we just grabbed an extra steak knife from the kitchen and used some sawing action and good old fashioned elbow grease. Since we're coating the tubing in tape there's no need to make the cut particularly neat.


Next is to connect the two raw ends of the tubing together. Beka had found a nifty trick to get the tubing to slide on to the couplings easier, which was to boil some water and dip the ends of the tubing into the water for a few seconds.


And Voila!


We have hula hoops!


But they're not finished yet. Now it's time to make them pretty. So we start with the first round of tape.


Beka brought glitter and hologram tape in addition to colored gaffer's tape. The sparkly tape is a lot more high-maintenance than the gaff tape, which is much more forgiving when wrapping around a hoop. The glitter tape bunches at the edge, and apparently can come unstuck at the edges when worn down by extensive use. Other people recommend using the gaff tape to cover the edges of the glitter tape so as to hold it down and prevent such problems. Beka has used that technique on all of her hoops, and none of her hoops had glitter tape coming off during the hours and hours of use they got at the international festival this weekend, so I can attest to the fact that it works! Here she is wrapping red gaffer's tape around the blue glitter tape already applied to her hoop.


We kept at it for hours. We made 9 hoops in total: 5 full sized and 4 small hoops which Beka wants to practice juggling with.

Almost done!


And here are the results. How beautiful!


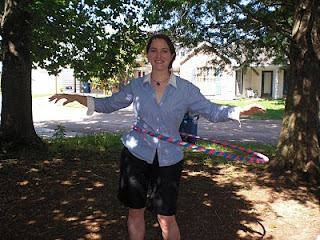
And of course now we get to play with them!

Sunday, April 18, 2010

An Altered Shirt

I was going through my dressers the other day looking for clothes to give to goodwill. One of the primary criteria for such selection is naturally "items I never wear". Now it's not like I never wear t-shirts, but I have an awful lot of t-shirts and I don't wear them particularly often. But I can't just give them away to goodwill since they have strong sentimental value from my college memories.

There is one t-shirt that I wear frequently: a pale blue shirt I picked up at an outdoor market in Ljubljana, Slovenia. It's an unlikely favorite since it's not a color I normally wear, but in a random spurt of creativity back in 2006 I performed a bit of personalization on it that simultaneously made it more comfortable, more chic, and much more interesting.


I attempted that same alteration once more with another shirt I had bought at a gift shop in Bratislava, Slovenia but failed miserably. Either the fabric was different or my methods were flawed and I ended up with a ruined shirt which I eventually just threw away.

But I thought I'd give it another shot in an effort to bring new "life" to an under-used part of my wardrobe. I grabbed a selection of shirts and headed to the fabric store to purchase some extra-wide double fold bias tape to create the edging that had been so attractive on my Ljubljana t-shirt.

I started with just a normal tshirt.


And I cut off the hemline at the bottom, the cuffs on the sleeves, and the collar piece.


Then I sewed the bias tape to the newly cut edges, with the outside of the tape facing the inside of the shirt fabric.


And then I folded the bias tape over the raw edge of the t-shirt and sewed it neatly to the outside of the shirt fabric.


And like every good seamstress should, I made sure to iron it when I was finished.


Voila!


I did three shirts yesterday and two this morning. I expect that they'll all get a lot more wear now that they're much cuter. As regular t-shirts I couldn't escape the feeling that I was dressed like the typical MIT student in the "free t-shirt and old jeans" look whenever I put them on -- if you know what it's like to be a student at MIT (or most engineering schools I suspect) that's practically the school uniform.

I might pull some more shirts out of the dresser to fix them up right, but in the meantime here's the finished roll-call:


One of my favorite East Campus t-shirts, from the "Backstage at EC" rush theme, and the back view:


The show t-shirt from my final show with the Shakespeare Ensemble, "Titus Andronicus" in which I played Tamora, Queen of the Goths.


And the back view. Little known fact: Shakespeare invented "your mom" jokes. Best part: that joke was about me! (or rather, my character)


The t-shirt I (sort of but not really) helped design for First East, the hall I lived on in East Campus for the first 2.5 years of my undergraduate career. It's a design inspired by the disco dance floor the hall collectively made for the Bad Ideas Competition (but unfortunately I was too busy with costume designing a show to help out with).


The t-shirt I had printed for the Shakespeare Ensemble production of "Othello" in which I played the amazing role of Iago during my sophomore year at MIT. Such a stressful and wonderful production. I loved it.


Oh yeah, I look hot.