Wednesday, November 10, 2010

The Art of Procrastination

I’m sure it’s a common thing for many people in the surge of creative motivation to pick up a long and daunting project only to lose steam after a the first few hundred stitches, cuts, knits, purls, etc. I personally make a perfect poster child for such a demographic. I get excited about new projects with great rapidity. An idea will strike my fancy and I will pursue it diligently … for the first few days or so.

Then something will happen: I’ll hit a frustrating obstacle, get distracted by work or social obligations, or simply get bored and whatever I happen to be doing will simply fall to the wayside. If I’m really inspired, I’ll pick it up again in a week or two when I have a chance. This rarely happens. Most of the time it will sit on my sewing table or my dresser or hanging off the ironing board until a monthly clean will see it folded and put it away in a drawer somewhere. Wherever I live, I usually keep a drawer whose unofficial name is “to-do when I get around to it-drawer”. Needless to say, it rarely gets opened.

Quitting my job in the oilfield this past April seemed to have a beneficial effect on my productivity, and while my two weeks’ notice were ticking by I dug through my then 3 accrued “to-do when I get around to it” drawers and pulled out the mother of all set-aside projects. There is a lot of background story that goes with this mother, so now might be a good time to make yourself comfortable.

Back in 2006 I was ill-advisedly talked into costume designing the MIT Musical Theatre Guild’s summer production of Sweeney Todd entirely in “steampunk” Victorian era, years before I even knew what “steampunk” meant. In addition to waistcoats, cravats, blouses and petticoats, I constructed six or seven full Victorian gowns complete with gi-normous bustles and big, poufy trains.

photo credit Jax Kirtley

This show involved more construction than nearly all the rest of my productions combined, and I recruited my assigned costume crew, talented friends, and random freshmen just arrived on campus to help me get it all done in time. Eventually, and after very little sleep the costumes were finished, the show looked beautiful, and my mind quickly turned to considering projects for myself.


I had enjoyed costuming Sweeney Todd for the practice it gave me in constructing period Victorian outfits. I kept the dress pattern I used, and with the “bustle pillow” the entire cast had signed and presented to me for my crew-member gift, I had the beginning pieces to make a full dress of my own. Hours of shopping later, I had a full set of fabrics, linings, lace and tasseled edgings, and all the notions necessary to make a beautiful costume.


It was almost a surprise it took me as long as it did to set this project aside. I worked on it continuously throughout the month of September, and finished the most difficult part that month: the bodice. It was roughly that time that the school semester got busy, so months passed before I made an attempt to pick up where I had left off. Most of the big pieces were partially assembled, like the bodice (minus the sleeves), but none were actually completed.


When I moved out of my apartment in Somerville and into the student housing in Boston, it came with me and wasn’t touched. When I moved down to Louisiana after graduation it came with me and wasn’t touched. I bought a whole new set of plastic storage drawers to contain it and the remainder of my forgotten projects and there it sat in my closet in Lafayette for years.

With my oodles of free time I had all the tools I needed to pull that mother back out of her drawer. Components had been lost, and pieces had been confused, but I managed to take stock of what I had and what I needed.


I began by fixing the confounding petticoat. A long-lost memory emerged from the ether, and I remembered that I had set the petticoat aside after realizing that I had (again) sewed a pair of the panels in upside-down. I ripped them out, realigned them, and proceeded to sew them in … upside-down … again. I ripped them out one more time, laid them on the floor and thought about them for a good, long while. I then went about checking and rechecking each piece, and then writing “top” and “bottom” on each petticoat panel and then checking the labels one more time for good measure. I sewed them in one last time, and what do you know it but I finally got it right!


I then sewed the sleeves on the bodice and got to have the fun job of embellishing it with all the frilly lacy scrumptiousness I had held on to for such a purpose. Extra fabric from the bustle and apron remnants provided the perfect contrast for the decorative buttons down the front.


I completed the skirt and embellished it similarly to the bodice. I put together the bustle and the apron draperies, and installed the hardware necessary to hold them in place. Bit by bit everything was coming together until before I knew it, one sunny day in April I was finished!


And of course, dressing up ensued and many photographs were taken.


My sister was scandalized by this last photo, since I was clearly a Victorian prostitute with my lack of stockings and bloomers. So I made sure to have those ready for my gown's unveiling at Halloween in Salem, Massachusetts.


Amongst the denizens of Salem, my huge bustle was a big hit!


Ahh, the glory of it all.

But it wouldn’t have been a real procrastination project if I hadn’t procrastinated many months more before posting this description of it, sigh.

Friday, July 16, 2010

The OTHER Secret Project: REVEALED! - or also known as - The Wedding Lace Extravaganza

So when I would say before that "such and such a project started it ALL*" (here, and kinda here,). I was actually talking about this project. This lofty, inspiring, heart-warming, and utterly life-consuming project that is: The Wedding Lace.


About a year and a half ago, my best friend Meg asked me to be the maid of honor in her wedding. She was marrying her long-time boyfriend and another dear friend of mine, Jon. I was so thrilled I was literally speechless for a good 5 minutes, and it wasn't long before I knew I had to do something all out spectacularly wonderful to celebrate their union (besides throw a crazy bachelorette party!).

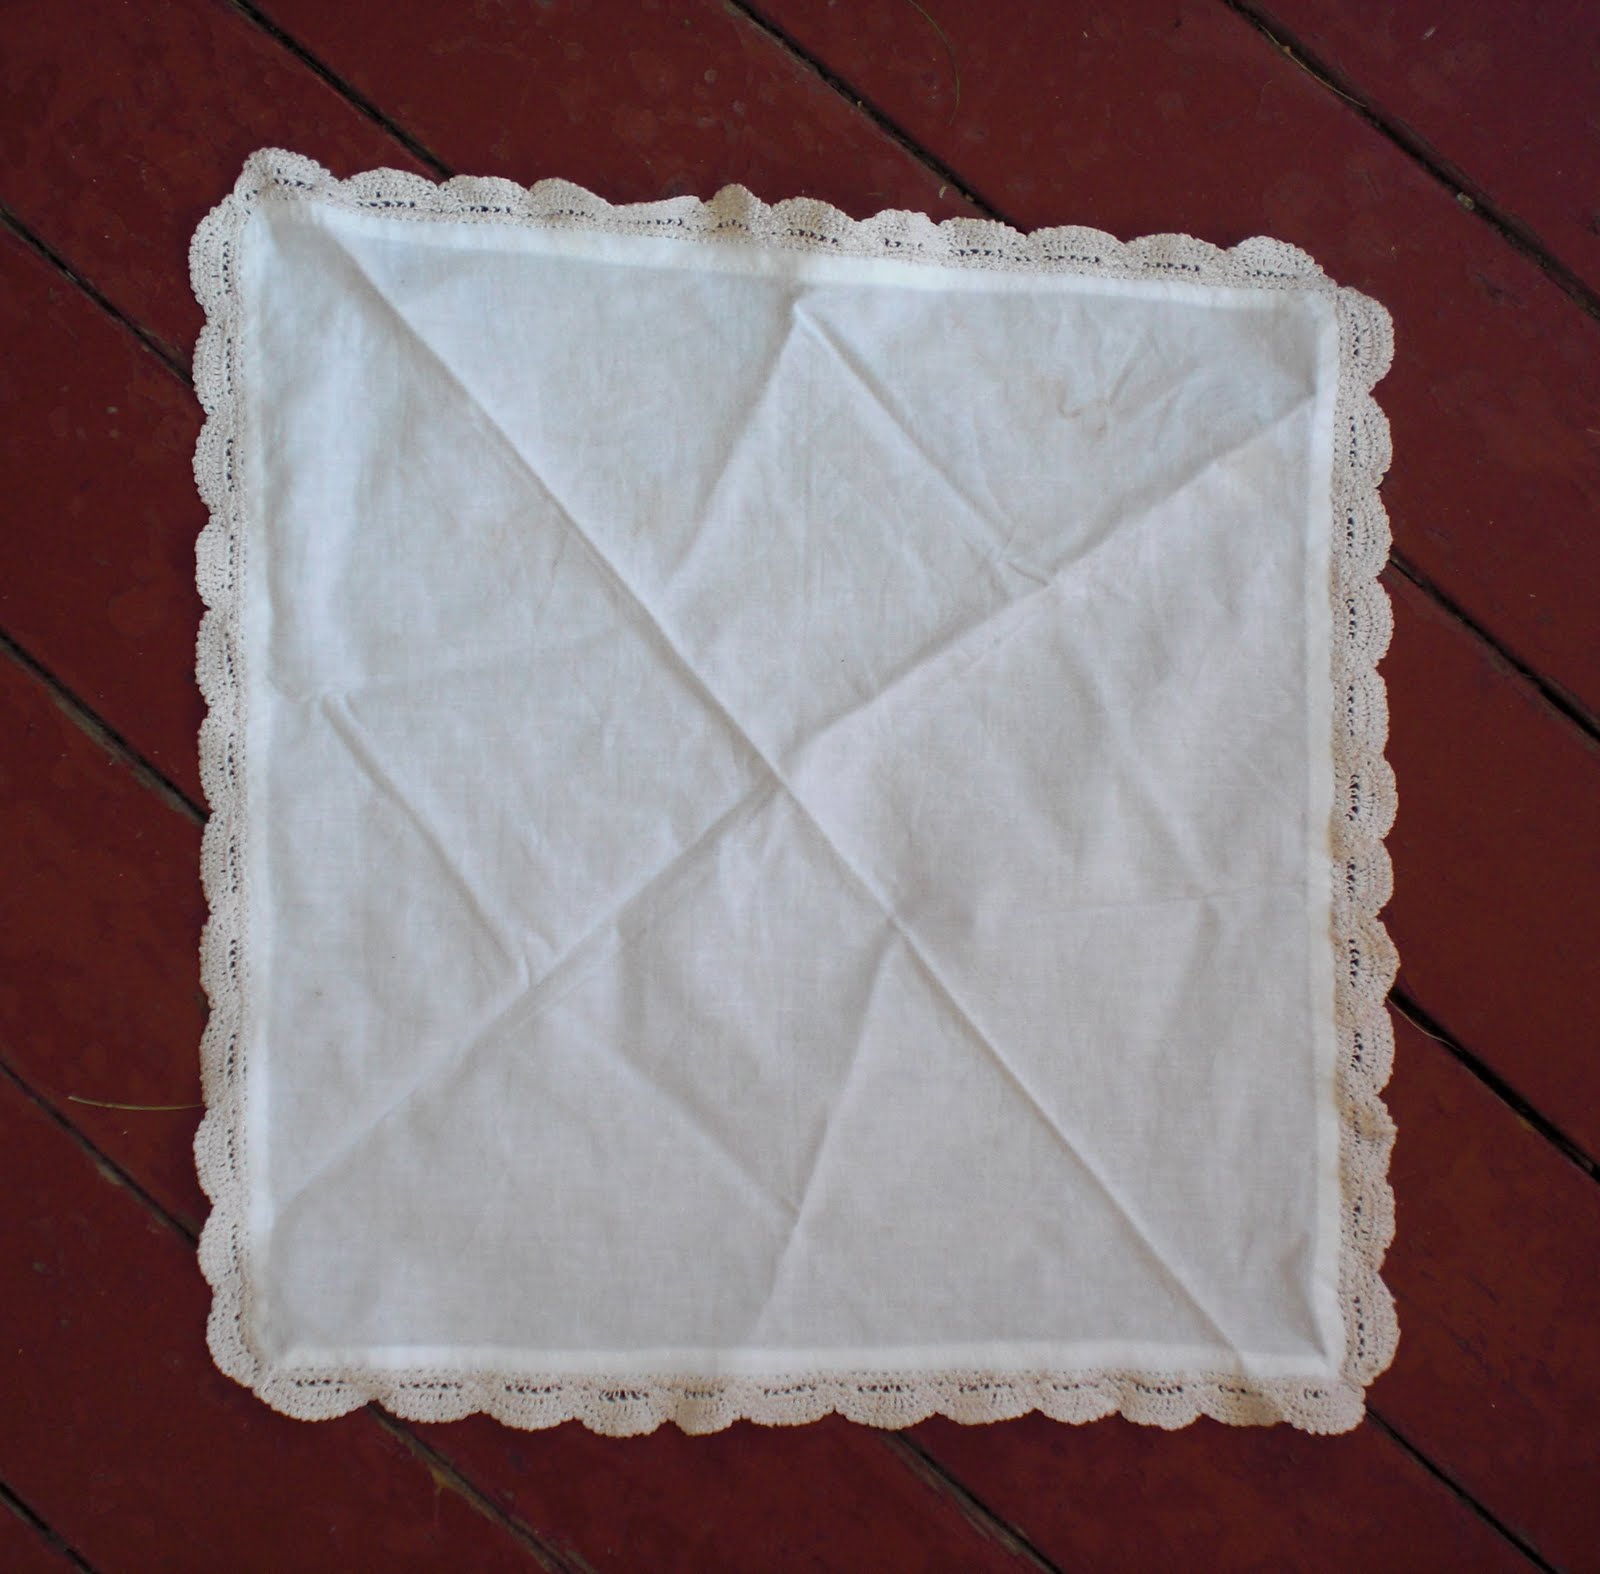
I soon decided what I was going to make as a wedding gift: hand-crocheted lace-edged handkerchiefs. One for Meg, one for me, one for her mother, one for each of the bridesmaids, and, fortunately for my sanity I stopped there.

It was entirely for this reason that I even attempted to learn how to crochet lace those many months ago. And thanks to my mother, The Complete Guide to Thread Crochet by Rita Weiss, and Fifty Beautiful Edgings by Terry Kimbrough, I was able, after a few months and many interesting test projects, to accomplish what I had set out to do.

The first step was to pick a lace pattern. The following pattern was my very first attempt, originally done in red and abandoned halfway through because I was too inexperienced to decipher the instructions without the careful guidance and hands-on-teaching of my mother. She patiently walked me through the first steps during a visit home, but as soon as I left I could no longer wade through the muddle myself (until I got the brilliant idea of calling her up at all hours of the night and day as my 24-hr crochet helpdesk). Later I reattempted this lace and was able to finish a length of it:


But it seemed to fussy for Meg. Good for someone else's wedding handkerchief, perhaps, but not hers. I tried another pattern which I quickly disregarded as inappropriate for handkerchiefs and turned into a headband instead.

The third pattern was the winner. It was just like Meg, lovely in its simple beauty (not like there is anything simple about Meg), and I knew would make the perfect handkerchiefs to celebrate her nuptials.


The next debate was about colors. White, ivory or ecru? How about slate blue, her wedding color? And the handkerchief fabric -- matching or contrast? Countless test pieces later...


I chose ecru lace on thin white muslin fabric.


And then came the real work.

With the first twelve inch length of lace, I finally figured out how to read the pattern properly. As I finished each new length, some overly bulky lace taught me all about maintaining proper thread tension.

As the months progressed, I counted and recounted my pieces, with the constant internal monologue: "Four lengths per handkerchief. Six handkerchiefs makes twenty-four lengths. Seven lengths finished, so the lace for one and three-quarters of a handkerchief is done. Seven months to the wedding, seventeen lengths of lace to go." When I was working at an efficient pace, I could finish a single length of twelve-inch lace in four hours.

But the months passed quickly, and construction was pretty slow since I was reluctant to bring the crocheting to the rig to work on in my downtime, fearing dirty hands and smudged lace. I finished all of the lace just over a month before the wedding date. Then I washed and blocked them all with stainless steel pins on my ironing board.


I purchased some high-quality, old-fashioned muslin, machine-hemmed some squares, and began sewing. Each length of lace. One at a time. By. Hand.


And all the while this was going on, I was in the process of selling all my furniture, packing up the rest of my belongings, and moving my entire life northward from Louisiana to Massachusetts (with stops in Florida & Pennsylvania along the way). By the time I had reached Boston, I had four handkerchiefs left to finish. By the time I made it to Meg's parents' house a few days before the blessed event, I had one and one half undone. By the night before the wedding, I was still had a two lengths left to sew on the final handerchief. So as Meg's father and aunt caught up on work they were missing, and Meg and Jon talked in the kitchen till one o'clock in the morning, I sewed and sewed and sewed, ducking my project out of sight should either of the couple or the bride's mother happen to wander by.

Huzzah! I finished them all in time. I did not have the luxury of an extra day to block them, so I used a hot iron with plenty of steam instead. It served its purpose admirably, and the handkerchiefs were folded, wrapped, and packed in my bag with the other 10 million things I had to take to the wedding.

I presented each lady with her handkerchief just before we all got dressed, and was just thrilled to see everyone enjoy my work. I had so much fun at Meg's wedding, and was happy just to have given her something to remind her of it.


And just for good measure, here's a small gallery of lace-handkerchief "money shots". It's enough to make one drool!


Haha, I ended up with the runt of the litter. I realized too late that the hastily-hemmed muslin was more trapezoidal than square, and I couldn't bear giving it as a gift to anyone. Regardless, it always makes me happy to see it (and helpfully wiped away a tear here and there that weekend).


* Author's Note: By "All", I have of course been referring to this blog and many of the projects described herein. To go back to the beginning of my craft life I would have to go all the way back to the dress I made at age twelve out of American Flag-printed calico whose pattern I traced by literally penciling an outline of another dress laid on the floor, and then stitched the entire thing together by hand. Unfortunately no evidence, neither physical or photographic remains of this historic piece, so you'll just have to take my word for it.

Saturday, July 3, 2010

A Secret Project: REVEALED!

I have a funny habit of making surprise presents for friends and family as gifts. Now you might not think this habit is so funny, but it tends to mess up my blog-posting schedule since I don't want to post anything online about it until the recipient has had a chance to receive and enjoy their gift.

But now the suspense is over! The gifts are given and I get to reveal all the secret projects. This post will be all about my brother's birthday present, so stay tuned for the next post where I reveal my other secret project.

Back in May, 2009, I was trying to decide what to give my brother Eric for his birthday. After much flip-flopping and wishy-washing, I came up with the great idea of making him a needlepoint pillow since I just happened to have a piece of cross-stitch cloth lying around, and oodles of embroidery thread doing nothing but entangling itself slowly.

I hate using cross-stitch patterns since I always lose count, and I usually get "writers' block" when trying to come up with an original design, so it wasn't long before I decided upon the image to stitch: a free-styled replica of the painting he had made for me the previous Christmas. Here's a picture, taken by his fiance Susan, of the painting in progress:


And here I am, enjoying the completed work on Christmas day, 2008. The painting flew back to Louisiana with me the next day, and it sat propped up on my piano from whence it inspired me in May to cross-stitch the pillow.


Now I know what you're thinking: "But Holly, if you were making it for your brother's birthday in May 2009, why haven't you posted it yet?" The unfortunate answer to that is as follows. I began the project a week before Eric's birthday. By the time his birthday had arrived on May 25th, I had been forced to realize that his present would be late. And not just weeks late, butmonths late. This was going to take a very long time.

So over the next 10 months I stitched and stitched and stitched (and occasionally paused for other, significantly shorter projects as you have seen). Countless movies and television shows flew by as I added row upon row, and color upon color.


In March, 2010 I was nearly finished. During a lull in drilling, I completed the stitching during my last hitch offshore, and was excited to come home and finish it for good.

I trimmed the edges and sewed a velveteen backing of dark burgundy that I happened to have some extra of from a random Halloween costume from 2008. I soon realized I had to make a trip to the fabric store for two reasons: A. The pillow would look ridiculous without some sort of edging, and B. I had no stuffing to make it pillow-y.

So I bought piping and polyfill, and returned home eager to finish it. The piping turned out to be a good fit, although I had been worried it would be too bulky. There wasn't much of a selection at the store, and I'd already bitten off far enough to chew with this project that I wasn't going tomake my own piping. For goodness' sake! I bought a yard of piping, thinking that to be plenty. I was one lucky idiot, however, for I hadn't measured the pillow's picture and the one yard of piping turned out to be just barely enough.


My trusty Janome sewing machine barely got through the multiple layers of thick material, but after a bunch of false starts, a few unfortunate arrangement mistakes on my part, and a broken needle or two, I finally had the thing pieced together.


I stuffed the darn thing and hand-sewed the hole closed. I used fabric glue to close the ends of the piping, which were prone to some nasty unraveling. I considered hiding it with a bow of a similar color, but I eventually decided the disguise unnecessary and the embellishment overmuch. It wasn't the neatest finish, but I hope it gives it a little "handmade character" rather than detracting from the quality of the cross-stitch work.


Overall I am terribly proud of the final result. This was my first ever freestyle cross-stitch, and I was thrilled with how true to the original image it turned out.


It came a year later than planned, but Eric was very patient with me and was able to enjoy receiving it at his birthday party this year!


Friday, April 30, 2010

The Hello Kitty Sweatshop

Yesterday Beka and I were struck by a sudden inspiration to make hats. A friend of ours has a pair of hats from Japan that look like animals, so we borrowed one in order to make our own -- but instead of just any old animal we decided to go for "Hello Kitty" in various color combinations.

What transpired as a result of our half-baked idea ended up being hours and hours in front of the sewing machine, with fleece and felt flying everywhere. But we both ended up with two of the cutest hats imaginable as a result of our long-winded efforts. Materials required: fleece for the hat, felt for the decorations, and yarn for ... pom-poms?


We measured the hat we borrowed, and drew up a pattern for it. It ended up needing a fair amount of alterations, but with Beka having a small head and me having a HUGE head, it was inevitable when we were both using the same pattern.


The body of the had was quite simple with four identical pieces shaped like a bloated triangle to create the round shape plus a fifth piece: a long wide band to make the brim. Oh, and those little pieces? Those are the ears!


We had planned on making hats of two color schemes: black and white. The black version lent well to "girl-punk" style, and the white version I decided to do "traditional" Hello Kitty, so once the body of the hats were made I began sewing on the faces by hand.


Meanwhile Beka was doing a trial run of putting together some pom-poms, a craft which neither of us have done since our Elementary School days. I also remembered a technique for "faking" a bow where you sew two layers of fabric plus interfacing or another stiffener together, then scrunch it up in the middle with a ribbon wrapped around tight. Beka did a real bow on her black hat with actual ribbon, but I used pink felt and the aforementioned "fake" to do my bows


It kept going, and going, and going. After adding eyes, noses, whiskers, bows, and in one case even a pair of ear flaps and pom-poms, we almost missed dinnertime! But eventually we did finish.

Here are the traditional style Hello Kitty hats in white (note: Hello Kitty actually has a yellow nose, but we only had black and pink felt. I'm not going to quibble about it cause it looks cute as is).


And here are the "punk-rock" Hello Kitty hats in black, including mine with the ear-flaps and pom-poms. Beka made a set of pom-poms, and might add those to her white hat later. She is still considering adding ear flaps to the black hat, but is as yet undecided.


And then of course we had to go out to show off the awesome fruits of our awesome labors.


Meow.

Wednesday, April 28, 2010

Hula Hoops, YES, I made Hula Hoops

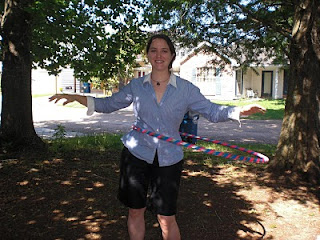
Another day and I'm not packing. I spent all of this weekend at Lafayette's Festival International de Louisiane (and not packing). While I was hanging out downtown enjoying wonderful live music from all over the francophone world, I spent a lot of time with a friend Beka, who has recently gotten very interested in hula hooping. She brought a bunch of hula hoops that she had made to the festival, and we were hula-ing up a storm during a lot of the performances.

Beka offered to make me a hula hoop of my own to take back up north, and so today we decided to throw ourselves a hula hoop making party! She came over with all the ingredients:

First of all the tubing: generic 3/4" polyethylene sprinkler tubing from Home Depot.


Next: couplings and electrical tape to secure the ends of the cut tubing.


And finally the decorative tape for the finishing touches.


First Beka cut the tubing to be the proper length. My utility knife was sad and dull, so we just grabbed an extra steak knife from the kitchen and used some sawing action and good old fashioned elbow grease. Since we're coating the tubing in tape there's no need to make the cut particularly neat.


Next is to connect the two raw ends of the tubing together. Beka had found a nifty trick to get the tubing to slide on to the couplings easier, which was to boil some water and dip the ends of the tubing into the water for a few seconds.


And Voila!


We have hula hoops!


But they're not finished yet. Now it's time to make them pretty. So we start with the first round of tape.


Beka brought glitter and hologram tape in addition to colored gaffer's tape. The sparkly tape is a lot more high-maintenance than the gaff tape, which is much more forgiving when wrapping around a hoop. The glitter tape bunches at the edge, and apparently can come unstuck at the edges when worn down by extensive use. Other people recommend using the gaff tape to cover the edges of the glitter tape so as to hold it down and prevent such problems. Beka has used that technique on all of her hoops, and none of her hoops had glitter tape coming off during the hours and hours of use they got at the international festival this weekend, so I can attest to the fact that it works! Here she is wrapping red gaffer's tape around the blue glitter tape already applied to her hoop.


We kept at it for hours. We made 9 hoops in total: 5 full sized and 4 small hoops which Beka wants to practice juggling with.

Almost done!


And here are the results. How beautiful!


And of course now we get to play with them!

Monday, April 26, 2010

Sewing vs. Packing, Part 1

I made a rule for myself today: only one box of spare fabric for when I move home. That means I either have to give away, throw away, or use up a significant pile in the meantime. Luckily I gave myself enough time to pack up all of my belongings that I have plenty to travel, party, and sew in between my spurts of packing productivity.

Today as I was sorting through my unused fabric and tenaciously saved remnants, and pulled out a leftover piece from a dress I made back in college. Based on halter-top pattern from Nicole Miller designing for a pattern company I don't remember now, I changed the back to simplify it to look like a classic halter. Here I am enjoying it at the First East Bad Ideas Ball back in 2004 alongside Anisa, the eponymous creator of "Anisa Knits".


But I had plenty of fabric left over as it turns out, and I happened to come across a pattern that I must not have seen in years, packed in along with some other fabric I also hadn't seen in years (Where does it all come from? Where does it all go?)

A few months ago I discovered that I adore cowl-neck tops. They're very flattering on my figure, in my own opinion. The "2 Hour" label made it look quick and easy (and hopefully not too cheap and cheesy), and I thought I'd give it a whirl.


I made sure to measure myself again before cutting out the pieces, but it still came out far too big. I had to take it in a good 2-3 inches all around in order to avoid the "bag lady" look. And I think I was rather successful:


No, I hadn't yet washed my hair that day.


And a back view for good measure. I wasn't thrilled about the seam the pattern caused, but it is the back and I certainly don't have to look at it.


See what I mean about cowl necks being flattering on me? I adore this fabric even though I'm pretty sure it's spandex or something like that, but it does have this divine embossed velvet flower pattern in black all over, and just enough glitter to sparkle but not enough to make a mess.

But yikes! Did you catch that sunburn on my arms? I had quite the weekend at Festival International de Louisiane this weekend, and most of that came from the very last day when, despite a good 5 applications of SPF 70 sunscreen, I still failed to protect myself entirely.

I liked how this pattern turned out, and if I have more knit fabrics (which most of mine aren't) I'll have to use it again. I also like the look of this halter pattern more than the Nicole Miller pattern I used to make the dress back in college.

I have a bit more fabric left -- not enough for any garments, but enough for an accessory or two. Last time (back in college) I made a long band which I wrapped in my hair which turned out well. The photo is somewhere... else.

And it's late. I'm sleepy and I'm probably going to spend far too much time tomorrow sewing instead of packing. Can't wait!