Showing posts with label Lace Crochet. Show all posts

Wednesday, June 29, 2011

Christmas in July

Procrastination, anyone?

Here are some Christmas presents I made this year, that I guess have taken a while to post about. Yeah, that's how I roll.

I decided to do sets of crocheted coasters as gifts last year, with varying color schemes personalized for each recipient. Each coaster would have a solid color base and a crocheted lace doily applique of a unique pattern which were adapted from various snowflakes I found around books and the internet; adapted enough to not look too seasonal. The yarn I purchased was acrylic for the base and cotton for the applique, so entirely machine washable, and heat tested to make sure they had no problems with hot mugs. Then I found little metal tins which would hold each set.

White on beige for my father and stepmother, since it's a classical color scheme she prefers.


White on blue for my aunt and uncle, since blue is her favorite color.


Red on black for my grandparents. I inherited my preference of red from my grandmother, who takes her love to a marvelous degree. These would fit right in with her decor.


A marvelous success! They turned out just as I had hoped.

Friday, July 16, 2010

The OTHER Secret Project: REVEALED! - or also known as - The Wedding Lace Extravaganza

So when I would say before that "such and such a project started it ALL*" (here, and kinda here,). I was actually talking about this project. This lofty, inspiring, heart-warming, and utterly life-consuming project that is: The Wedding Lace.


About a year and a half ago, my best friend Meg asked me to be the maid of honor in her wedding. She was marrying her long-time boyfriend and another dear friend of mine, Jon. I was so thrilled I was literally speechless for a good 5 minutes, and it wasn't long before I knew I had to do something all out spectacularly wonderful to celebrate their union (besides throw a crazy bachelorette party!).

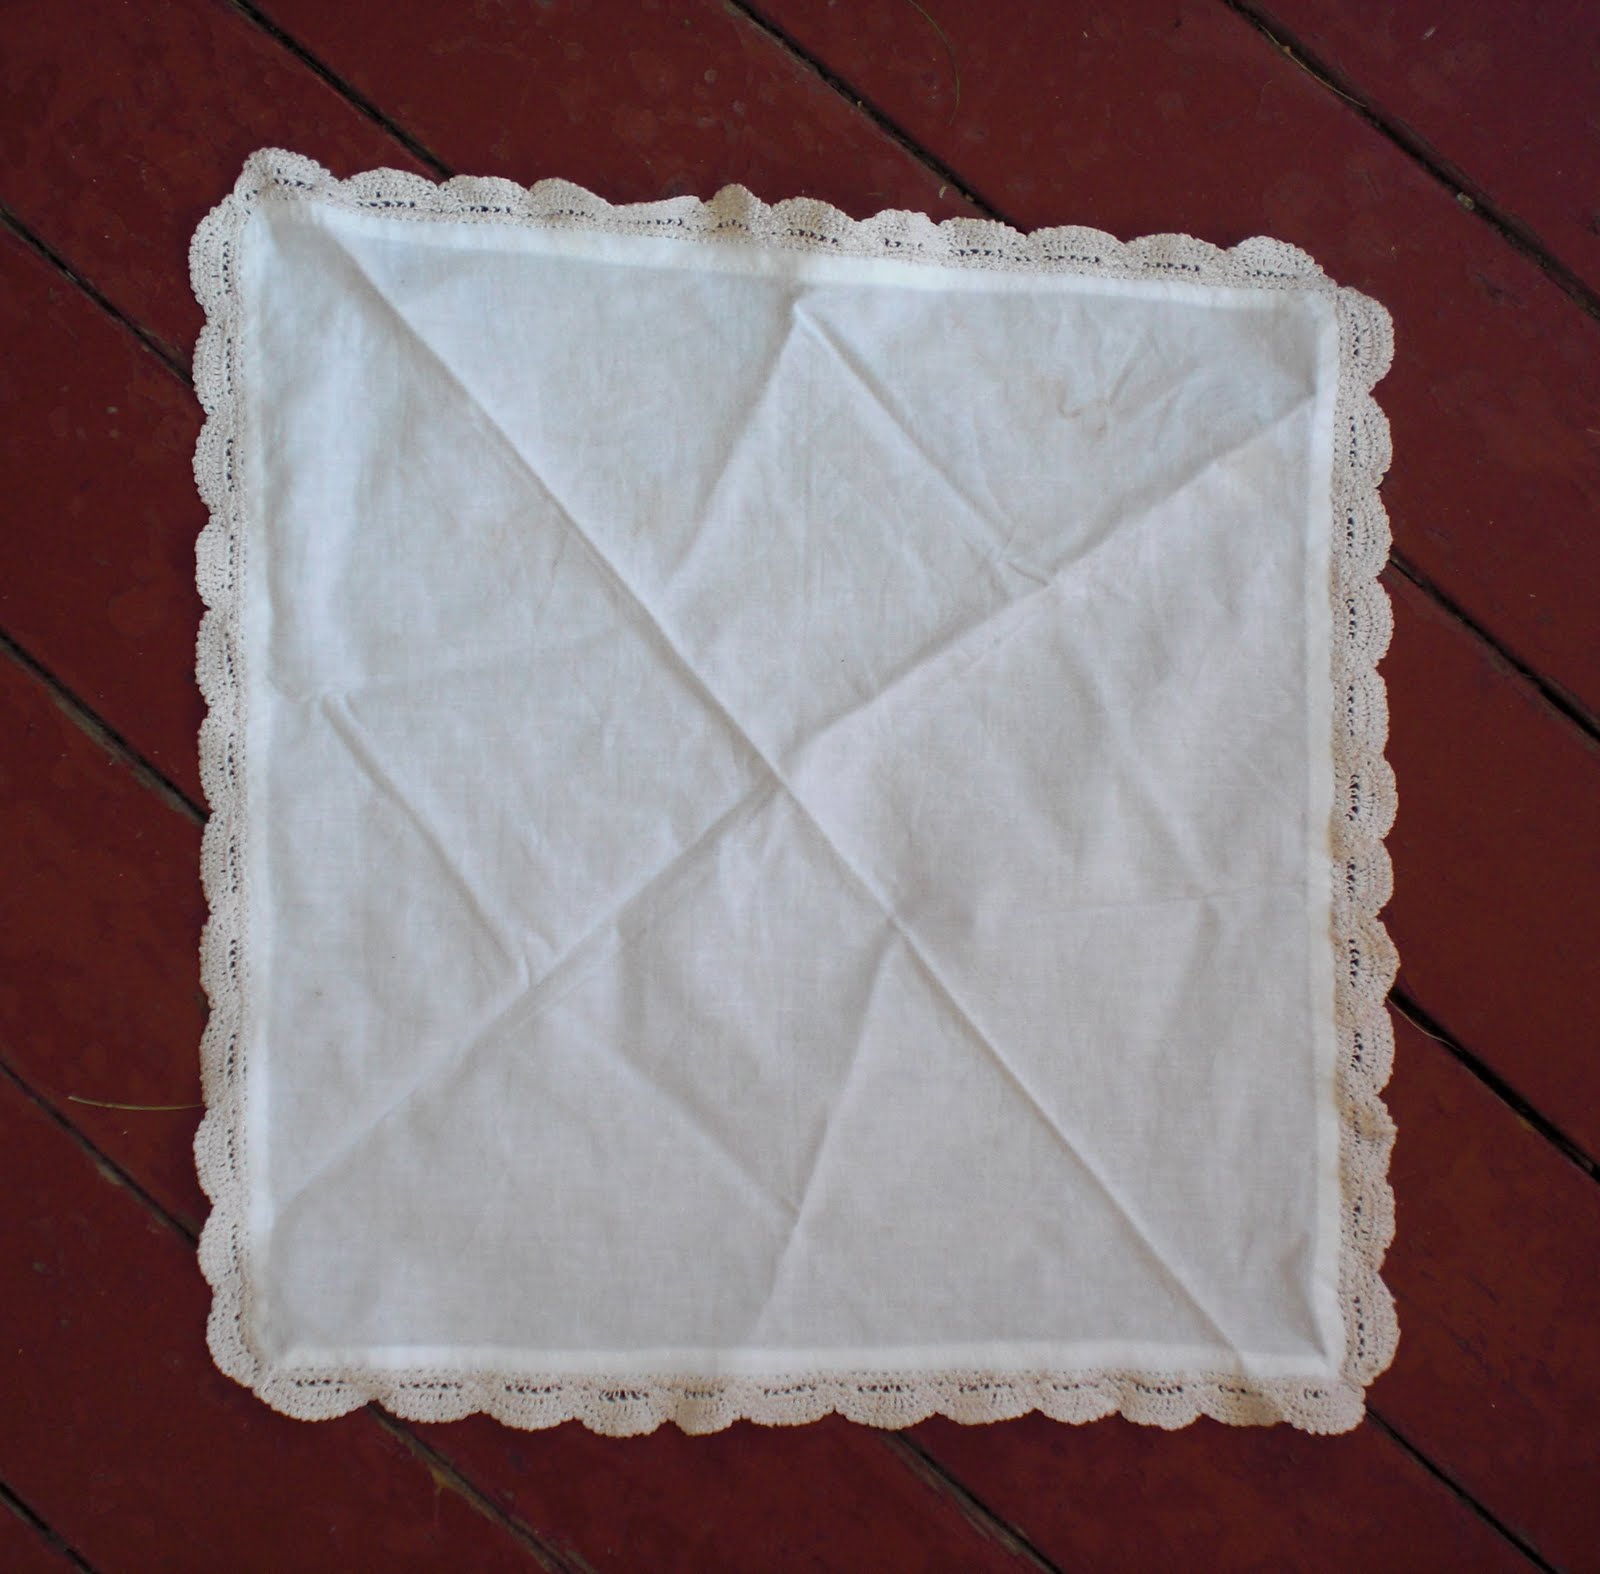
I soon decided what I was going to make as a wedding gift: hand-crocheted lace-edged handkerchiefs. One for Meg, one for me, one for her mother, one for each of the bridesmaids, and, fortunately for my sanity I stopped there.

It was entirely for this reason that I even attempted to learn how to crochet lace those many months ago. And thanks to my mother, The Complete Guide to Thread Crochet by Rita Weiss, and Fifty Beautiful Edgings by Terry Kimbrough, I was able, after a few months and many interesting test projects, to accomplish what I had set out to do.

The first step was to pick a lace pattern. The following pattern was my very first attempt, originally done in red and abandoned halfway through because I was too inexperienced to decipher the instructions without the careful guidance and hands-on-teaching of my mother. She patiently walked me through the first steps during a visit home, but as soon as I left I could no longer wade through the muddle myself (until I got the brilliant idea of calling her up at all hours of the night and day as my 24-hr crochet helpdesk). Later I reattempted this lace and was able to finish a length of it:


But it seemed to fussy for Meg. Good for someone else's wedding handkerchief, perhaps, but not hers. I tried another pattern which I quickly disregarded as inappropriate for handkerchiefs and turned into a headband instead.

The third pattern was the winner. It was just like Meg, lovely in its simple beauty (not like there is anything simple about Meg), and I knew would make the perfect handkerchiefs to celebrate her nuptials.


The next debate was about colors. White, ivory or ecru? How about slate blue, her wedding color? And the handkerchief fabric -- matching or contrast? Countless test pieces later...


I chose ecru lace on thin white muslin fabric.


And then came the real work.

With the first twelve inch length of lace, I finally figured out how to read the pattern properly. As I finished each new length, some overly bulky lace taught me all about maintaining proper thread tension.

As the months progressed, I counted and recounted my pieces, with the constant internal monologue: "Four lengths per handkerchief. Six handkerchiefs makes twenty-four lengths. Seven lengths finished, so the lace for one and three-quarters of a handkerchief is done. Seven months to the wedding, seventeen lengths of lace to go." When I was working at an efficient pace, I could finish a single length of twelve-inch lace in four hours.

But the months passed quickly, and construction was pretty slow since I was reluctant to bring the crocheting to the rig to work on in my downtime, fearing dirty hands and smudged lace. I finished all of the lace just over a month before the wedding date. Then I washed and blocked them all with stainless steel pins on my ironing board.


I purchased some high-quality, old-fashioned muslin, machine-hemmed some squares, and began sewing. Each length of lace. One at a time. By. Hand.


And all the while this was going on, I was in the process of selling all my furniture, packing up the rest of my belongings, and moving my entire life northward from Louisiana to Massachusetts (with stops in Florida & Pennsylvania along the way). By the time I had reached Boston, I had four handkerchiefs left to finish. By the time I made it to Meg's parents' house a few days before the blessed event, I had one and one half undone. By the night before the wedding, I was still had a two lengths left to sew on the final handerchief. So as Meg's father and aunt caught up on work they were missing, and Meg and Jon talked in the kitchen till one o'clock in the morning, I sewed and sewed and sewed, ducking my project out of sight should either of the couple or the bride's mother happen to wander by.

Huzzah! I finished them all in time. I did not have the luxury of an extra day to block them, so I used a hot iron with plenty of steam instead. It served its purpose admirably, and the handkerchiefs were folded, wrapped, and packed in my bag with the other 10 million things I had to take to the wedding.

I presented each lady with her handkerchief just before we all got dressed, and was just thrilled to see everyone enjoy my work. I had so much fun at Meg's wedding, and was happy just to have given her something to remind her of it.


And just for good measure, here's a small gallery of lace-handkerchief "money shots". It's enough to make one drool!


Haha, I ended up with the runt of the litter. I realized too late that the hastily-hemmed muslin was more trapezoidal than square, and I couldn't bear giving it as a gift to anyone. Regardless, it always makes me happy to see it (and helpfully wiped away a tear here and there that weekend).


* Author's Note: By "All", I have of course been referring to this blog and many of the projects described herein. To go back to the beginning of my craft life I would have to go all the way back to the dress I made at age twelve out of American Flag-printed calico whose pattern I traced by literally penciling an outline of another dress laid on the floor, and then stitched the entire thing together by hand. Unfortunately no evidence, neither physical or photographic remains of this historic piece, so you'll just have to take my word for it.

Tuesday, February 23, 2010

Christmas Snowflakes

I just realized that I forgot to post this project!

Goodness me, how absent-minded. Well, I'm sure that plenty of people across the country have yet to take down their Christmas decorations, so surely this won't be so egregiously untimely as I can simply claim similar intentions.

Growing up with a rather creative mother who crochets, I remember having numerous crocheted lace snowflakes adorning our Christmas tree that we delicately wrapped in tissue (actual facial tissue, haha). They were always part of our ornament stash, so I never wondered where they came from. It wasn't for years that I actually realized my mother had made them herself!

So it was natural for me that during my very first year of learning to crochet lace that I make a few snowflakes that very Christmas. It turned out they make very good gifts!

I just *happened* to have some 30 gauge thread (the thinnest crochet thread readily available) in white lying around from one of my (cough) secret (cough) projects in progress, so I picked out my favorite snowflake pattern and whipped up 3 or 4 in a matter of days.

Before they're blocked they look like funny blobs:


I've been using a sheet of craft foam that I sit on top of my ironing board to block each of my items, but unfortunately it doesn't give very good contrast for the white snowflakes. I played with the contrast settings on this photo, but don't strain your eyes too much trying to see them.


I had some leftover silk ribbon a friend had given me that was extra from a college project of hers. I never knew what I was going to do with it, but it came in quite handy as a bow-tie for the snowflakes! Here you can see the finished product hanging above my fireplace (fireplace not pictured -- just trust me on it).


My output of snowflakes was severely limited by the fact that I left for the rig a good week before Christmas day. Let me know next year if you want a snowflake for Christmas, and I'll be sure to include one in your Christmas card!

Tuesday, February 16, 2010

Engagement Gift

I've been working on a lot of long-term projects lately that are intended to be surprises, so please excuse my lack of recent posts. I can't risk spoiling the element of surprise in the gifts by posting them all over the internet, after all!

But I can't quite excuse how late this post is, since this surprise gift was given back in July.

The gift was for my brother's fiance, Susan, in celebration of their engagement. Here is a picture of the happy couple:


At the time I was working on a crocheted lace project (no more details! That's a reeeallly long term project that is still a surprise). I used some of the thread from that and grabbed a string of beads from a nearby store in Houston on purpose to make a beaded lace necklace from the following pattern I found online.

I used white thread and faux turquoise beads, which were irregularly shaped and gave a much less regimented appearance once all assembled.

I had to think a good long while about how to make it work, and I eventually realized that I had to string all of the beads onto the thread ahead of time in order to successfully crochet them onto the necklace.

The crocheting itself took me around six hours, and I have to say I was quite pleased with the results! Here are some pictures of me modeling the finished product.


Now Susan probably has a much smaller neck than myself, so it won't be so much of a choker on her. I haven't had the luck to see her wear it, but she let me know how much she liked it. As soon as I have a picture of her wearing it, I'll add it to this post, but in the meantime here's a picture she took of it on a statuette she sent to me:


I'm expecting to do more beaded crochet pieces in the future, as this was a very successful first try!

Tuesday, September 1, 2009

90th Birthday

My grandmother recently informed me that it would be very welcome if I were to send a birthday card to her brother, my great-uncle, who turns 90 in 5 days.

I decided to to one better, and crochet him a little gift as well! I've seen some freeform crochet pieces on Etsy.com which has gotten me interested in improving my talents in that form.

I thought I would make him a "badge of honor" to celebrate his 90 years, so I took the same red thread I've used for many previous projects to put this together.

Upon creating the base form, I wanted a bit of lacy embellishment. I decided that making loops around the entire number would make it too frilly and difficult to read, so I came up with a clever font that reminds me of a whimsical Microsoft typeface I remember from years ago (but cannot come up with an example to display).

I thought an exclamation point would create a good balance in the overall look, so I ended up with "90!" as the final result. I soaked them in a 1:4 mixture of stiffening solution: water and blocked them out.

I sewed the 9 and the 0 together before blocking them, but the exclamation point i left separated because I wanted the loops to be in their final shape beforehand, thus enabling the positioning to be just right. This turned out to be the right decision.

The 1:4 stiffener:water solution was also a good guess. It gave it enough stiffness to keep it flat, but enough flexibility so that it still felt like fabric. I then decorated a card to attach it to and used a large safety pin to affix it with.

I had briefly considered using an actual brooch backing, but I decided that a large safety pin would be easier for 90-year old fingers to work, since my intention for this piece is to be pinned to a shirt.

And here's an example of it pinned to my shirt!
It looks pretty snazzy if I do say so myself.

Saturday, July 18, 2009

In The Beginning

My first attempt at lace crochet was a "Scalloped Edge" lace that I found in a book called The Complete Guide to Thread Crochet by Rita Weiss. The book is very useful for me, since it's pictorial diagrams of all the different types of stitches are easy to understand at 3 o'clock in the morning when I'm half-catatonic from the lack of sleep due to coming off of night shift on the rig, and I can't for the life of me remember how to do a slipknot.

Unfortunately, the instructions they give for various projects seem to be riddled with mistakes and typos. I sat with my mom for hours back in March trying to decipher what they were telling me to do. This was only possible if my mother read the instructions, tried to work through the mistakes in their directives, and then perform the crocheting herself. I would watch what she did and make occasionally successful attempts to replicate it myself.

But my vacation ended and I went home to Louisiana, where I no longer had my mother to show me what to do. Perhaps this would have been a good time to get a webcam?

I was sent offshore in April (which you can read about here), and although I brought my crocheting with me and occasionally took it out of its bag, I made not a single stitch in the weeks I was there. After a long stretch on the rig, I came home and decided I wasn't going to do anything work-related for a week. So because I wasn't forced to be awake during the day, I had no impetus to switch off my night-shiftedness, and through mere inertia I remained a night-owl for nearly a week and a half. I quickly realized that the Scalloped Edging was a lost cause, for there was no way I was going to be able to continue it on my own.

And thus began a crocheting marathon, and the project which I cut my teeth on. I spent the ensuing nights on the "Simplicity Doily"; perhaps a misguided idea since it also came from the same book notorious for the poor instructions. The doily is shown in the bottom left picture on the cover.


The nights continued slowly, as I would struggle through row after row of the project, occasionally trying to guess what the author actually meant to say, and often completely bewildered at what I was actually supposed to accomplish. In comes Mom to the rescue again! I would work until I was completely stuck, and then wait for 5am Eastern Standard Time (4am for me in Louisiana), at which point I would call up my mother and explain my dilemma. After describing the dilemma, we would have a long discussion about what the instructions said, what I thought they meant, and what the picture looked like, and eventually I would have a reasonable approximation of what I was supposed to do. The rest of the early morning hours would continue like that, with my mother receiving about 2-3 calls daily. I would go to bed sometime around 12pm, sleep till evening, and make one more quick phone call before my mom went to bed and I continued on my project.

The employees at blockbuster started to recognize my car as it pulled up when I would make daily visits to rent the next season of Desperate Housewives, or whatever other TV series was providing background entertainment for my crocheting that night. Eventually, I finished!! I actually completed a crocheting project!
It only took me another month or so to go out and buy the stainless steel pins I needed to block it. Here is what it looked like while blocked:


Unfortunately the foam piece that I bought to provide the base for blocking was too thin for the fully stretched-out doily, and I sort of fudged the edges. I'll probably re-block it again one of these days (which probably translates to roughly a year from now). I used a stiffening solution at half-concentration, mostly as a test of the solution itself. And here is the final result of the doily, adorning my dining room table.

I might still revisit the abandoned Scalloped Edging now that I have gained sufficient proficiency in lace-making such that my mother rarely gets the early-morning calls from me anymore. It looked lovely in the picture and would make a perfect edging for a handkerchief.

Saturday, June 27, 2009

Hotel Room Crocheting

I'm slightly stranded in a hotel room in Cameron, TX (a good 2 hours from any real civilization), and I decided to pass the time by working on some of my lace crocheting practice.

I've got this big ball of red 10 gauge cotton crochet thread and a size 6 (1.80mm) hook. I've been carting these around to the oil rigs I've been sent to lately, and this is actually the first time I've pulled it out on one of my trips.

I picked out a pattern of lace from 50 Beautiful Edgings by Terry Kimbrough. The pattern in the book is shown below.


Now this pattern is great because instead of having to pick out the entire length ahead of time, you build it horizontally. So after about eight inches of lace, I decided to turn what was just going to be a sample piece into a functional headband. I have a frustratingly large head, preventing me from finding well fitting glasses, hats, and also headbands. Most headbands I buy end up being too tight and slipping off my head, so I've always wanted to make my own large-headed headbands.

I measured the area around my head where the headband would go and subtracted two inches to make it a good fit, and even that made it quite loose, but the proof will be in how well it stays on over the course of an entire day. (Another option would be to just bobby-pin it into place, but I'll try that later. I didn't bring any bobby pins to the rig).

And here is the final result:


A close up of the detail:


shows how I may have made a mistake or two along the length of lace. This was a very easy pattern, so I quickly abandoned reading the pattern to watch "Green Wing" (a terribly amusing British hospital comedy) and occasionally did a 5-chain instead of 2-chain. I'm not too concerned, since this was only planned as a sample originally.

I attached the two ends with slip-stitches, creating the headband. It has a bit of a seam, but all store-bought headbands I've ever owned had one as well, and I just turn it on the inside at the nape of my neck.

The lace hasn't been blocked or starched, but then I'm still semi-stranded in my hotel room in Texas, so I consider it quite a success! Huzzah!